Search This Blog

Friday, May 20, 2016

Web Filtering On Squid 3 With QuintoLabs Content Security 1.4 And Windows Active Directory Integration

From the link:  https://www.howtoforge.com/web-filtering-on-squid-3-with-quintolabs-content-security-1.4-and-windows-active-directory-integration


This HOWTO will show you how to set up a Squid proxy server deployed on CentOS or RedHat 6 Linux with web and content filtering done by QuintoLabs Content Security with proxy users transparently authenticated by Windows 2008 R2 based Active Directory. This is the work in progress and all comments are welcomed. The HOWTO is targeted at novice users and may sometimes seem too thorough for more advanced gurus. No compilation magic will be involved in our setup so any system administrator accustomed to Windows will be able to easily follow the instructions. :)
We will use VMWare's Workstation 8 to setup the staging test lab to make sure everything works before deploying it on the production servers and real hardware. The chosen virtualization platform does not really matter much and any other virtualization solution can be successfully used too.

Prerequisites

The test lab will contain three machines - a domain controller running Microsoft Windows 2008 R2 server, a user machine running Windows 7 and a proxy machine running CentOS 6 with Squid Proxy 3 coming from standard repository. I presume you have ISOs of Windows Server R2, Windows 7 and RedHat (CentOS) 6 Linuxes somewhere around you. I also presume installation of Microsoft Windows and Active Directory is not a problem for you.
The domain we are creating is called example.lan. The IP addresses in use come from standard network used in NAT networking in VMWare Workstation - 192.168.28.0. Name of the Domain Controller will be dc.example.lan, proxy will be called proxy.example.lan and client workstation client.example.lan.

Step 1. Install Domain Controller

First, perform basic installation of Microsoft Windows and do the initial post install configuration.
  1. Create a new virtual machine for domain controller. Put the Windows Server ISO into the virtual CD drive and install it. Set the Administrator's password to "P@ssw0rd" (without quotes).
  2. After installation finishes set the static IP address of the server to 192.168.28.20, subnet mask 255.255.255.0, default gateway 192.168.28.2. Set the preferred DNS server to 192.168.28.2. Start the web browser and navigate to your favorite web site to test that Internet connection is working properly.
  3. Set the time zone on dc.example.lan to the one you live in.
  4. Change the name of the computer to "dc" (without quotes) so that after installation of the Active Directory and DNS server later our domain controller has the FQDN address of dc.example.lan.
Now install Active Directory.
  1. Click Start - Administrative Tools - Server Manager and run the Roles Wizard to add the "Active Directory Domain Services" role.
  2. When role wizard finishes, open the command prompt and run "dcpromo.exe" to set up the New Domain in a New Forest. Specify example.lan as the FQDN name of the forest root domain. Leave Forest and Domain functional levels on "Windows Server 2003", mark DNS server as the additional option for this domain controller. When installation wizard complains about "A delegation for this DNS server cannot be created because the authoritative parent zone cannot be found or it does not run Windows DNS server" just say Yes to continue the installation and install a new instance of DNS server on this domain controller. Wait a little until installation is finished. Then reboot the VM.
Now set up static IP address information for dc.example.lan and proxy.example.lan hosts.
  1. Using DNS management snap-in at dc.example.lan create a primary IPv4 Reverse DNS Lookup zone for network id 192.168.28, set Replication Scope "to all DNS servers running on domain controllers in this domain: example.lan" and allow both nonsecure and secure dynamic updates.
  2. Add new pointer (PTR) record for the dc.example.lan and check using nslookup that dc.example.lan can be successfully resolved into its IP address (192.168.28.20) and vice versa.
  3. Add Host (A) and Pointer (PTR) records for the proxy.example.lan and check using nslookup that proxy.example.lan can be successfully resolved into its IP address (192.168.28.21) and vice versa.

Step 2. Install Windows 7 Client Machine

Now create a VM that will act as a machine for the users of the proxy. Give VM a name - client.example.lan, set up Windows 7 as you normally do, join the machine to the example.lan domain created on Step 1 and make a bunch of domain users that will act as proxy clients.

Step 3. Install CentOS Proxy Machine

Create a new virtual machine named proxy.example.lan. Ensure the network adapter is set to "NAT" mode. Start the VM and follow the steps of the CentOS install wizard mostly accepting the defaults. Configure machine hostname as "proxy.example.lan" and root password as "P@ssw0rd" (without quotation marks). Wait a little until the installation is complete and then reboot the system.
NOTE 1: For the purpose of this howto I have SELinux explicitly disabled in /etc/selinux/config.
NOTE 2: For the purpose of this howto I have firewall explicitly disabled by typing #chkconfig iptables off and #chkconfig ip6tables off in the root terminal and restarting the proxy.example.lan VM.

Step 3.1 - Configure Networking

CentOS 6 deployed as VM usually does not have network subsystem enabled by default. In order to enable networking we need to do the following:
  1. Set the static IP address in /etc/sysconfig/network-scripts/ifcfg-eth0
    BOOTPROTO=static
    NETMASK=255.255.255.0
    IPADDR=192.168.28.21
    ONBOOT=yes
  2. Set the default gateway in /etc/sysconfig/network
    GATEWAY=192.168.28.2
  3. Point to the DNS server at dc.example.lan by editing /etc/resolv.conf
    nameserver 192.168.28.20
Restart your network subsystem by
# /etc/init.d/network restart
or by just restarting the virtual machine. After restart confirm that the network functions correctly by typing the following commands in the terminal and watching for any error outputs
$ping -c 3 192.168.28.2
Finally update the VM
# yum update
and install needed prerequisites for the next steps:
# yum install bind-utils

Step 3.2 - Configure Network Time Synchronization (NTP)

To perform successful Kerberos authentication system time on proxy.domain.lan must be synchronized with system time on dc.example.lan. The easiest way to do that is to install network synchronization server and point it to the domain controller.
  1. Install NTP server:
    # yum install ntp
  2. Make it start automatically at system boot time
    #chkconfig ntpd on
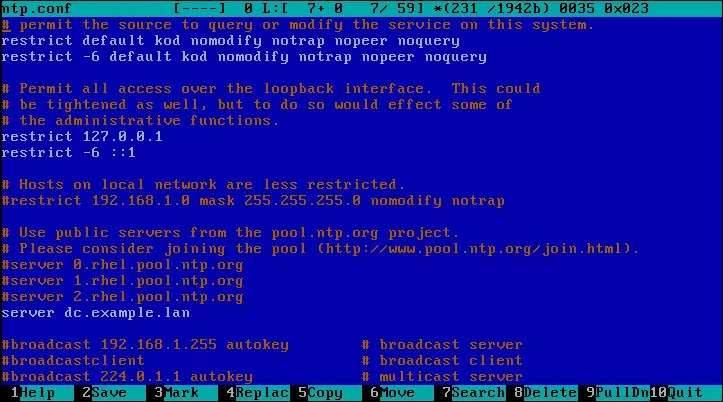
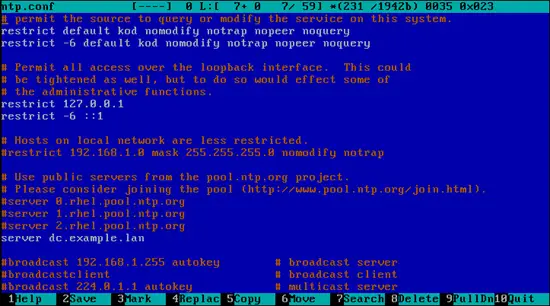
  3. Open /etc/ntp.conf and add the name of the domain controller:
  4. To perform initial time sync stop the service
    #service ntpd stop
    and run the manual sync command
    #ntpdate -b dc.example.lan
    Then start the NTP service again
    #service ntpd start
NOTE: If you get "Clock skew too great while getting initial credentials" later while running the kinit utility then the sync was probably not successful and you are advised to check that the server name in /etc/ntp.conf is correct and restart the ntpd service. Log files at /var/log/messages may contain more information about the reason of unsuccessful synchronization.

Step 3.3 - Install Kerberos

All needed Kerberos packages are installed by default in CentOS. But to ensure you really have all the needed Kerberos packages on the proxy.example.lan type
# yum install krb5-workstation krb5-libs
Kerberos configuration is stored in /etc/krb5.conf, open it with the text editor and change the contents to the following:
[logging]
 default = FILE:/var/log/krb5libs.log
 kdc = FILE:/var/log/krb5kdc.log
 admin_server = FILE:/var/log/kadmind.log

[libdefaults]
 default_realm = EXAMPLE.LAN
 dns_lookup_realm = false
 dns_lookup_kdc = false
 ticket_lifetime = 24h
 renew_lifetime = 7d
 forwardable = true
 default_tgs_enctypes = rc4-hmac
 default_tkt_enctypes = rc4-hmac
 permitted_enctypes = rc4-hmac

[realms]
 EXAMPLE.LAN = {
  kdc = dc.example.lan
  admin_server = dc.example.lan
  default_domain = example.lan
 }

[domain_realm]
 .example.lan = EXAMPLE.LAN
 example.lan = EXAMPLE.LAN
To test that Kerberos authentication is set up correctly type in the root terminal
# kinit Administrator@EXAMPLE.LAN
The command should complete without errors. The command
# klist
should print the info about acquired Kerberos ticket.
Ticket cache: FILE:/tmp/krb5cc_0
Default principal: Administrator@EXAMPLE.LAN

Valid starting     Expires            Service principal
12/07/11 11:07:58  12/07/11 21:08:00  krbtgt/EXAMPLE.LAN@EXAMPLE.LAN
    renew until 12/14/11 11:07:58
Now reboot the VM.

Step 3.4 - Install Samba and Join the proxy.example.lan to Active Directory

NOTE: this step heavily relies on RedHat 6 Documentation side at http://docs.redhat.com/docs/en-US/Red_Hat_Enterprise_Linux/index.html, especially on books "Deployment Guide" and "Enterprise Identity Management Guide".
In order to be able to transparently authenticate clients of Squid proxy using their Active Directory's credentials the server with Squid must be joined into the Active Directory domain (i.e. example.lan). The easiest way to do it is to run Samba on the proxy machine.
  1. Install Samba by typing
    # yum install samba
  2. Make it always start at boot time
    # chkconfig smb on
    and
    # chkconfig nmb on
  3. Open the /etc/samba/smb.conf and ensure its contents look like this (this is the result of running testparm -s on proxy.example.lan):
    [global]
     workgroup = EXAMPLE
     realm = EXAMPLE.LAN
     server string = Samba Server Version %v
     security = ADS
     log file = /var/log/samba/log.%m
     max log size = 50
     cups options = raw
    
    [homes]
     comment = Home Directories
     read only = No
     browseable = No
    
    [printers]
     comment = All Printers
     path = /var/spool/samba
     printable = Yes
     browseable = No
    
    Note we set workgroup to EXAMPLE, realm to EXAMPLE.LAN (capital letters) and security to ads.
  4. Restart Samba services
    #service smb restart
    and
    #service nmb restart
If you now browse the network from the client.example.lan you should see a proxy machine in the EXAMPLE workgroup.
Now join the machine proxy.example.lan into the Active Directory:
  1. Stop Samba services by typing
    # service smb stop
    and
    #service nmb stop
  2. Initialize Kerberos subsystem on proxy.example.lan by typing
    # kinit Administrator@EXAMPLE.LAN
    , it should ask for password, and complete without errors.
  3. Ensure you got a correct Kerberos ticket by typing
    # klist
  4. Join Active Directory by typing
    # net ads join -S dc.example.lan -U Administrator%P@ssw0rd
    . You should get something like this as an output: join_ad

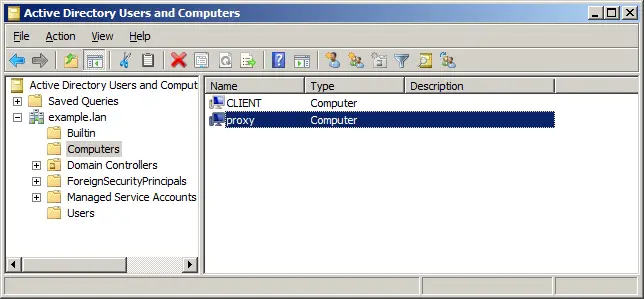
  5. Open "Users and Computers" snap in on dc.example.lan and ensure the proxy computer account now present in the "Computers" tree node
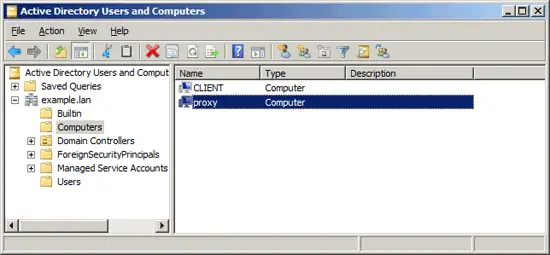
    joined_proxy
  6. Reboot the proxy.example.lan VM.

    Windows Active Directory Integration - Page 2

    Step 4. Install Squid Web Caching Proxy

    Now we need to install Squid proxy on the proxy.example.lan and set up the Kerberos Negotiate Authentication so that users do not enter their passwords while browsing through Squid and still we are able to see the user name in the logs.
  7. Type
    # yum install squid
  8. Open /etc/squid/squid.conf and add the following line visible_hostname proxy.example.lan. Also check that http_access allow localnet and acl localnet src 192.168.28.0/24 are present in the config file.
  9. Make Squid autostart at system boot:
    # chkconfig squid on
  10. Reboot your VM or just start squid for the first time manually
    # service squid start

Verify that squid runs correctly by pointing your users browser from client.example.lan to the name of the proxy server (proxy.example.lan) and surfing to some of your favorite websites.
In order to enable Kerberos Negotiate Authentication on Squid do the following:
  1. Add entry to default keytab file (/etc/krb5.keytab) using Samba:
    [root@proxy ~]# net ads keytab add HTTP -U administrator
    Processing principals to add...
    Enter administrator's password:
  2. Verify the service principals were successfully written to the keytab file:
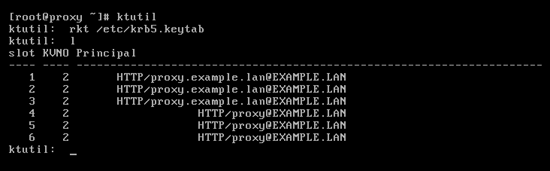
    verify_keytab
  3. Change owner of the /etc/krb5.keytab to squid:squid:
    # chown squid:squid /etc/krb5.keytab
    and set access permissions to 400 (read only)
    # chmod 400 /etc/krb5.keytab
    Note: this setup implies Squid is the only kerberized service on the machine, if more kerberized services are present then keytab should reside in /etc/squid directory and Squid must be told to use it through e.g. environment variable KRB5_KTNAME
  4. Add the following to Squid configuration file /etc/squid/squid.conf at the top of the file:
    #
    # Setup NEGOTIATE authentication for Active Directory with Kerberos
    #
    auth_param negotiate program /usr/lib/squid/negotiate_kerb_auth -s HTTP/proxy
    auth_param negotiate children 10
    auth_param negotiate keep_alive on
    #
    # to see the negotiator log messages in the /var/log/squid/cache.log uncomment
    # debug_options 29,9 and pass additional -d parameter to negotiate_kerb_auth
    #
    acl auth proxy_auth REQUIRED
    
    And the following after the "INSERT YOUR OWN RULE(S)" section:
    #
    # INSERT YOUR OWN RULE(S) HERE TO ALLOW ACCESS FROM YOUR CLIENTS
    #
    http_access deny !auth
    http_access allow auth
    
    # Example rule allowing access from your local networks.
    # Adapt localnet in the ACL section to list your (internal) IP networks
    # from where browsing should be allowed
    #http_access allow localnet
    #http_access allow localhost
    
    # And finally deny all other access to this proxy
    http_access deny all
    
Finally restart the VM. Open Internet Explorer on client.example.lan, Squid should not ask for authentication and log files in /var/log/squid/*.log should contain correct name of the browsing user.

Step 5. Install Apache Web Server

In order to be able to see the status and report information for Squid and QuintoLabs Content Security it is advised to also install Apache.
  1. Typing the following in the root terminal:
    # yum install httpd php mod_wsgi
  2. Make Apache autostart on boot:
    # chkconfig httpd on
  3. Reboot your VM or just start Apache for the first time manually by typing
    service httpd start
Open your browser and navigate to http://proxy.example.lan. You should see the “It Works!” greetings from Apache.

Step 6. Install QuintoLabs Content Security 1.4.2

Next step is to install the Content Security 1.4.2 for Squid from QuintoLabs (I will refer to it as qlproxy further in text). For those who do not know, QuintoLabs Content Security is an ICAP daemon/URL rewriter that integrates with existing Squid proxy server and provides rich content filtering functionality to sanitize web traffic passing into internal home / enterprise network. It may be used to block illegal or potentially malicious file downloads, remove annoying advertisements, prevent access to various categories of the web sites and block resources with explicit content (i.e. prohibit explicit and adult content).
Unfortunately QuintoLabs does not yet have online package repository for qlproxy so we have to get the CentOS / RedHat RPM package manually from QuintoLabs web site at http://www.quintolabs.com/qlicap_download.php using your favorite browser and upload the package to the system using scp. Another way is to type the following commands in the root terminal (as one line):
curl http://quintolabs.com/qlproxy/binaries/1.4.2/qlproxy-1.4.2-32d12.i386.rpm > qlproxy-1.4.2-32d12.i386.rpm
Wait a little until the download completes (approx. 21Mb) and run the following command to install the downloaded package
rpm --install qlproxy-1.4.2-32d12.i386.rpm
The RPM manager will run for a while and the program will be installed into /opt/quintolabs/qlproxy and /var/opt/quintolabs/qlproxy.
Next step is to configure qlproxy and integrate it with Squid. The configuration files are plain text and stored in /opt/quintolabs/qlproxy/etc/ *.conf, simple to modify with a handful of comments inside. I am going to perform the following modifications:
  1. As I personally do not like excessive advertising on the web and as I often browse through Russian and German sites I will enable extended adblock filtering by uncommenting the corresponding Russian and German AdBlock subscriptions in /opt/quintolabs/qlproxy/etc/adblock.conf file. I also do not like sites tracking me so I usually uncomment easy_privacy subscription in the same file.
  2. My kids sometimes play online games on my computer so I prefer to set the level of adult blocking heuristics to high in the /opt/quintolabs/qlproxy/etc/adultblock.conf by changing from heuristics_level = normal to heuristics_level = high. If anything is falsely blocked by the qlproxy I can later add it to the exceptions.conf file to have it passed through.
  3. The Parental Controls module of 1.4.2 supports filtering of HTML page contents for banned words and phrases (like Dansguardian) and I will enable it too.
  4. The urlblock module that uses community developed database of categorized domains incorrectly puts blogspot.com into an adult category... so I add it to the exception list in /opt/quintolabs/qlproxy/etc/exceptions.conf to be able to read some of my favorite blogs hosted there.
  5. I know that worms, trojans and other malware related software often connect to the world by IP addresses so I put a magic regexp into the /opt/quintolabs/qlproxy/etc/httpblock.conf file to filter them out url = http://\d+\.\d+\.\d+\.\d+/.*
After performing changes make the qlproxyd daemon reload the configuration by
/etc/init.d/qlproxy restart
Next we need to integrate it with Squid. As the qlproxy daemon supports the ICAP protocol this is quite easy, just follow these steps:
  1. Open the /etc/squid/squid.conf in vi by typing
    vi /etc/squid/squid.conf
    in the root terminal.
  2. Add the following lines somewhere at the end of the file:
    icap_enable on
    icap_preview_enable on
    icap_preview_size 4096
    icap_persistent_connections on
    icap_send_client_ip on
    icap_send_client_username on
    icap_service qlproxy1 reqmod_precache bypass=0 icap://127.0.0.1:1344/reqmod
    icap_service qlproxy2 respmod_precache bypass=0 icap://127.0.0.1:1344/respmod
    adaptation_access qlproxy1 allow all
    adaptation_access qlproxy2 allow all
    
Now restart Squid by typing
service squid restart
in the root terminal. After restart try surfing the same sites with your browser and see how nicely ads are blocked. Another useful test is to go to the eicar.com web site and try to download a sample artificial eicar.com virus to see that com files are blocked by the download filter.
The last thing to do is to integrate the qlproxy with Apache to be able to see the reports on user browsing activity. This is actually quite easy, open the /etc/httpd/httpd.conf file and add the following near the
directive:
   WSGIScriptAlias /qlproxy.cgi /var/opt/quintolabs/qlproxy/www/data/qlproxy.wsgi
   
 WSGIApplicationGroup %{GLOBAL}
 Order deny,allow
 Allow from all
   

   Alias /qlproxy /var/opt/quintolabs/qlproxy/www
   
        Options FollowSymLinks
        AllowOverride None
   
Reload the apache by typing in the terminal
service httpd restart
You can navigate to http://proxy.example.lan/qlproxy to see the generated reports. The Negotiate authentication setup described earlier should help with displaying correct user names and not just IP addresses in the activity reports.

Resume

Everything is in place to start the web surfing without needs to provide passwords and without much of the internet trash out there - just point your users browsers to proxy.example.lan port 3128 and enjoy.

Using Active Directory for Authentication in Linux Squid Proxy Server

Use the blue Nav bar above to access the main index pages!

Creating Kerberos Keytab Files Compatible with Active Directory


How to create a keytab file for a Kerberos user logging into Active Directory.  What's a keytab file?  It's basically a file that contains a table of user accounts, with an encrypted hash of the user's password.  Why have a keytab file?  Well, when you want a server process to automatically logon to Active Directory on startup, you have two options:  type the password (in clear text) into a config file somewhere, or store an encrypted hash of the password in a keytab file.  Which is safer?  Well, you can decide.  In any case, you'd better do a good job of protecting the file (be it a config file or a keytab).

Anyway, the accepted way to store a hashed password in Kerberos is to use a keytab file.  Now the file can be created using a number of utilities.  On a Windows machine, you can use ktpass.exe.  On Ubuntu Linux, you can use ktutil.


Before I demonstrate how to create the keytab, a word about encryption.  There are a number of encryption types used for hashing a password.  These include DES-CBC-CRC, DES-CBC-MD5, RC4-HMAC and a few others.  Active Directory uses RC4-HMAC by default.  Back in Windows 2000, you could also use the DES types without any trouble, but since Windows 2003, only RC4-HMAC is supported, unless you make a registry change (to all of your domain controllers).  If you need to use DES for some reason, then refer to the Technet article at the bottom of the page.

Before attempting to create a keytab file, you'll need to know the user's kerberos principal name, in the form of username@MYDOMAIN.COM, and the user's password.

Creating a KeyTab on Windows (tested on Windows Server 2008 R2)
Open a command prompt and type the following command:

ktpass /princ username@MYDOMAIN.COM /pass password /ptype KRB5_NT_PRINCIPAL /out username.keytab
Creating a KeyTab on Ubuntu Linux (tested on Ubuntu 10.10 - Maverick Meerkat)
Open a terminal window and type the following commands:

ktutil
addent -password -p username@MYDOMAIN.COM -k 1 -e RC4-HMAC
- enter password for username -
wkt username.keytab
q

Testing the Keytab File
Now in order to test the keytab, you'll need a copy of kinit.  You can use the version that's on Ubuntu, or if on Windows, you can install the latest Java runtime from Sun (JRE).  In either case, you'll need to setup your /etc/krb5.conf file (on Linux) or c:\windows\krb5.ini (on Windows).  Either file should look something like this:

[libdefaults]
default_realm = MYDOMAIN.COM
krb4_config = /etc/krb.conf
krb4_realms = /etc/krb.realms
kdc_timesync = 1
ccache_type = 4
forwardable = true
proxiable = true

[realms]
MYDOMAIN.COM = {
kdc = mydomain.com:88
admin_server = mydomain.com
default_domain = mydomain.com
}

[domain_realm]
.mydomain.com = MYDOMAIN.COM
mydomain.com = MYDOMAIN.COM

[login]
krb4_convert = true
krb4_get_tickets = false

Once you've got your Kerberos file setup, you can use kinit to test the keytab.  First, try to logon with your user account without using the keytab:

kinit username@MYDOMAIN.COM
- enter the password -

If that doesn't work, your krb5 file is wrong.  If it does work, now try the keytab file:

kinit username@MYDOMAIN.COM -k -t username.keytab

Now you should successfully authenticate without being prompted for a password.  Success!

More Information
If you need to use any other encryption Type than RC4-HMAC, then you'll need to tweak your AD domain controllers.  Please refer to the following TechNet article.


Wednesday, September 23, 2015

X2Go Server installation


http://wiki.x2go.org/doku.php/doc:installation:x2goserver

Please see X2Go's Server Core for detailed documentation.

Ubuntu

Quick

You might have to install add-apt-repository first.
To install add-apt-repository on Ubuntu 10.04 or 12.04:
sudo apt-get install python-software-properties
To install add-apt-repository on Ubuntu 14.04:
sudo apt-get install software-properties-common
Once add-apt-repository is installed, run these commands:
sudo add-apt-repository ppa:x2go/stable
sudo apt-get update
sudo apt-get install x2goserver x2goserver-xsession

Detailed

After adding the X2Go PPA to your remote Ubuntu “desktop” server the next step is to install the packages x2goserver and x2goserver-xsession:
sudo apt-get install x2goserver x2goserver-xsession

**********************

I added below lines 

Now install xfce desktop environment

sudo apt-get install xfce4

X2Go connection with Ubuntu desktop

sudo add-apt-get-repository ppa:x2go/stable
sudo apt-get update
sudo apt-get install x2goclient

After this, open X2go client in desktop and give following details

Session name: any
host ip
login: user
ssh port: 22
Session type: XFCE

Give user credentials.


Debian

sudo apt-get install x2goserver x2goserver-xsession

Gentoo

Currently X2Go cannot connect to an openssh server compiled with the HPN patch. To make sure x2goserver works on your Gentoo server, you must recompile net-misc/openssh with HPN support disabled. Add the following line to /etc/portage/packages.use:
net-misc/openssh -hpn
Then recompile net-misc/openssh, update the configuration file, and restart the sshd server, as follows:
emerge -1 net-misc/openssh
dispatch-conf
/etc/init.d/sshd restart
Then, install net-misc/x2goserver .

Fedora 19 and later

No additional repositories required:
sudo yum install x2goserver

RHEL 7

Add the EPEL repository:
Check that you have activated the “optional” channel:
sudo subscription-manager repos --list
If the optional channel for your base channel is not active, activate it.
sudo subscription-manager repos --enable=rhel-7-server-optional-rpms
Or use the RHNS web interface to activate the channel “RHEL Server Optional”
Then
sudo yum install x2goserver

RHEL 6

There are two sources for X2Go packages for RHEL 6 - our packages repository and Fedora EPEL.
Select one method only and follow adding X2Go to RedHat to configure the repository of your choice.

Activating Optional Channels for RHEL

Check that you have activated the “optional” channel:
sudo rhn-channel -l
If the optional channel for your base channel is not active, activate it.
sudo rhn-channel --add -c rhel-x86_64-server-optional-6

Installing sshfs (fuse)

Currently, even in the optional channel, there is no official package for sshfs and it is not (yet?) included in the X2Go repo. Thus it has to be downloaded form an alternate source:

Option 1: Download the package manually

sudo yum install fuse fuse-libs
wget http://pkgs.repoforge.org/fuse-sshfs/fuse-sshfs-2.2-1.el6.rf.x86_64.rpm
sudo rpm -i --nosignature fuse-sshfs-2.2-1.el6.rf.x86_64.rpm

Option 2: Install EPEL

URL to most recent EPEL repo installation package available here
wget http://mirror01.th.ifl.net/epel/6/i386/epel-release-6-7.noarch.rpm
sudo rpm -i epel-release-6-7.noarch.rpm
sudo yum install fuse-sshfs

Installing X2Go Server

You should now be able to install the x2goserver package:
sudo yum install x2goserver
if you are installing from EPEL6 or EPEL7, install the x2goserver-xsession package also:
sudo yum install x2goserver-xsession

EPEL 5 (via Opensuse Build Service)

Add the X2Go repo to your yum configuration using tag RHEL_5.

Installing Required Dependencies (fuse and perl modules)

Download required packages manually

One approach is to download required packages manually. Yum will tell you what is needed, when you ask it to install x2goserver.
  • perl(File::BaseDir) - perl-File-BaseDir-0.03-1.el5.noarch.rpm
  • perl(Sys::Syslog) - perl-Sys-Syslog-0.27-1.el5.x86_64.rpm
  • fuse - fuse-2.7.4-8.el5.x86_64.rpm
  • libfuse.so.2 - fuse-libs-2.7.4-8.el5.x86_64.rpm
  • fuse-sshfs - fuse-sshfs-2.2-1.el5.rf.x86_64.rpm
  • rpm -i –nosignature perl-File-BaseDir-0.03-1.el5.noarch.rpm perl-Sys-Syslog-0.27-1.el5.x86_64.rpm
  • rpm -i –nosignature fuse-sshfs-2.2-1.el5.rf.x86_64.rpm fuse-libs-2.7.4-8.el5.x86_64.rpm fuse-2.7.4-8.el5.x86_64.rpm

Installing X2Go Server

You should now be able to install the x2goserver package:
yum install x2goserver
Unfortunately, in my case I get an error when x2goserver is being installed:
Running Transaction
  Installing: libXcomp3                    ####################### [ 1/24] 
  Installing: libNX_X11-6                  ####################### [ 2/24] 
  Installing: libNX_Xext6                  ####################### [ 3/24] 
  Installing: libNX_Xrender1               ####################### [ 4/24] 
  Installing: libNX_Xrandr2                ####################### [ 5/24] 
  Installing: libNX_Xtst6                  ####################### [ 6/24] 
  Installing: libNX_Xdamage1               ####################### [ 7/24] 
  Installing: makepasswd                   ####################### [ 8/24] 
  Installing: libXcompshad3                ####################### [ 9/24] 
  Installing: libNX_Xpm4                   ####################### [10/24] 
  Installing: libNX_Xinerama1              ####################### [11/24] 
  Installing: libXcompext3                 ####################### [12/24] 
  Installing: libNX_freetype6              ####################### [13/24] 
  Installing: libNX_Xfixes3                ####################### [14/24] 
  Installing: libNX_Xdmcp6                 ####################### [15/24] 
  Installing: libNX_Xcomposite1            ####################### [16/24] 
  Installing: perl-DBI                     ####################### [17/24] 
  Installing: perl-DBD-Pg                  ####################### [18/24] 
  Installing: perl-DBD-SQLite              ####################### [19/24] 
  Installing: perl-Config-Simple           ####################### [20/24] 
  Installing: nxagent                      ####################### [21/24] 
  Installing: x2goserver                   ####################### [22/24] 
"make_path" is not exported by the File::Path module
Can't continue after import errors at /usr/sbin/x2godbadmin line 25
BEGIN failed--compilation aborted at /usr/sbin/x2godbadmin line 25.
chgrp: cannot access `/var/lib/x2go/x2go_sessions': No such file or directory
chmod: cannot access `/var/lib/x2go/x2go_sessions': No such file or directory
  Installing: x2goagent                    ####################### [23/24] 
  Installing: x2goserver                   ####################### [24/24] 
"make_path" is not exported by the File::Path module
Can't continue after import errors at /usr/sbin/x2godbadmin line 25
BEGIN failed--compilation aborted at /usr/sbin/x2godbadmin line 25.
chgrp: cannot access `/var/lib/x2go/x2go_sessions': No such file or directory
chmod: cannot access `/var/lib/x2go/x2go_sessions': No such file or directory

Installed: x2goserver.i386 0:4.0.1.6-1.1 x2goserver.x86_64 0:4.0.1.6-1.1
Dependency Installed: libNX_X11-6.x86_64 0:3.5.0.20-4.1 libNX_Xcomposite1.x86_64 0:3.5.0.20-4.1 libNX_Xdamage1.x86_64 0:3.5.0.20-4.1 libNX_Xdmcp6.x86_64 0:3.5.0.20-4.1 libNX_Xext6.x86_64 0:3.5.0.20-4.1 libNX_Xfixes3.x86_64 0:3.5.0.20-4.1 libNX_Xinerama1.x86_64 0:3.5.0.20-4.1 libNX_Xpm4.x86_64 0:3.5.0.20-4.1 libNX_Xrandr2.x86_64 0:3.5.0.20-4.1 libNX_Xrender1.x86_64 0:3.5.0.20-4.1 libNX_Xtst6.x86_64 0:3.5.0.20-4.1 libNX_freetype6.x86_64 0:3.5.0.20-4.1 libXcomp3.x86_64 0:3.5.0.20-4.1 libXcompext3.x86_64 0:3.5.0.20-4.1 libXcompshad3.x86_64 0:3.5.0.20-4.1 makepasswd.x86_64 0:0.5.0-2.2 nxagent.x86_64 0:3.5.0.20-4.1 perl-Config-Simple.x86_64 0:4.59-14.1 perl-DBD-Pg.x86_64 0:1.49-1.fc6 perl-DBD-SQLite.x86_64 0:1.37-26.1 perl-DBI.x86_64 0:1.617-8.1 x2goagent.x86_64 0:3.5.0.20-4.1
Complete!
Despite being installed x2goserver is dysfunctional afterwards. On connection it yields an error:
Verbindung fehlgeschlagen DBD::SQLite::db prepare failed: no such table: sessions at /usr/libexec/x2go/x2gosqlitewrapper.pl line 423. Can't call method "execute" on an undefined value at /usr/libexec/x2go/x2gosqlitewrapper.pl line 431. 

EPEL 5 (via packages.x2go.org)

Due to bug#714, currently yum will not tell you what is needed.
Add the X2Go repo to your yum configuration by following the steps on that page.

Installing Required Dependencies (fuse and perl modules)

Download required packages manually

One approach is to download required packages manually. Yum will tell you what is needed, when you ask it to install x2goserver.
  • perl(DBI::db) - perl-DBI-1.615-2.x86_64.rpm
  • perl(File::BaseDir) - perl-File-BaseDir-0.03-1.el5.noarch.rpm
  • perl(Sys::Syslog) - perl-Sys-Syslog-0.27-1.el5.x86_64.rpm
  • fuse - fuse-2.7.4-8.el5.x86_64.rpm
  • libfuse.so.2 - fuse-libs-2.7.4-8.el5.x86_64.rpm
  • fuse-sshfs - fuse-sshfs-2.2-1.el5.rf.x86_64.rpm
  • rpm -i –nosignature perl-DBI-1.615-2.x86_64.rpm perl-File-BaseDir-0.03-1.el5.noarch.rpm perl-Sys-Syslog-0.27-1.el5.x86_64.rpm
  • rpm -i –nosignature fuse-sshfs-2.2-1.el5.rf.x86_64.rpm fuse-libs-2.7.4-8.el5.x86_64.rpm fuse-2.7.4-8.el5.x86_64.

Installing X2Go Server

You should now be able to install the x2goserver & x2goserver-xsession packages:
yum install x2goserver

SUSE

Adding Repositories

Release Version

SLES/SLED
zypper ar http://packages.x2go.org/sle/<distro-version>/extras x2go-extras
zypper ar http://packages.x2go.org/sle/<distro-version>/main x2go-release
OpenSUSE
zypper ar http://packages.x2go.org/opensuse/<distro-version>/extras x2go-extras
zypper ar http://packages.x2go.org/opensuse/<distro-version>/main x2go-release

Nightly Version

SLES/SLED
zypper ar http://packages.x2go.org/sle/<distro-version>/extras x2go-extras
zypper ar http://packages.x2go.org/sle/<distro-version>/heuler x2go-nightly
OpenSUSE
zypper ar http://packages.x2go.org/opensuse/<distro-version>/extras x2go-extras
zypper ar http://packages.x2go.org/opensuse/<distro-version>/heuler x2go-nightly

Installing X2GoServer

zypper install x2goserver

Workaround for Qt-based Applications and sudo/kdesu

Please keep this section in sync with the README.sudoers file in our packages!

Problem Description

OpenSUSE 11 and SLES/SLED 11 do not support /etc/sudoers.d as a place for custom sudoers config files.
If you are using any of these distributions and are having issues regarding running Qt applications with elevated privileges (e.g., via kdesu or sudo), please use this workaround.

Necessary Actions

  1. Copy the contents of the “x2goserver” file residing in the documentation directory /usr/share/doc/packages/x2goserver.
  2. Get elevated privileges. Either via
    su
    or
    sudo -i
  3. Launch
    visudo
  4. Paste the previously copied content at the end of the sudoers file.
  5. Save and exit your editor.

Arch Linux

x2goserver is available in the extra repo.

Monday, March 30, 2015

Installing Google Chrome in Ubuntu Linux

google-chrome-stable is availeble on 3rd Party Repository: Google Chrome (For Stable).
Follow the instruction for installation:
  1. Add Key:
    wget -q -O - https://dl-ssl.google.com/linux/linux_signing_key.pub | sudo apt-key add - 
    
  2. Set repository:
    sudo sh -c 'echo "deb http://dl.google.com/linux/chrome/deb/ stable main" >> /etc/apt/sources.list.d/google.list'
    
  3. Install package:
    sudo apt-get update 
    sudo apt-get install google-chrome-stable 
     
    From 
     
    http://askubuntu.com/questions/510056/how-to-install-google-chrome-on-ubuntu-14-04 


    Order from Amazon.in after becoming a member by clicking here

Wednesday, January 21, 2015

X11 Forwarding over SSH: run remote graphical app and display locally

X11 Forwarding over SSH: run remote graphical app and display locally 


Copied from  http://linuxcommando.blogspot.in/2013/05/x11-forwarding-over-ssh-run-remote.html

In the modern networked environment, we often wish to run an application on a remote host while we are comfortably logged in on our local computer.
Assuming both machines are Linux-based, and the application runs on the graphical X desktop, the following approaches come to mind:
  • VNC
  • X11 forwarding over SSH
This article focuses only on X11 forwarding. X11 forwarding over SSH enables you to run a remote X app and display it locally, with traffic between the 2 hosts encrypted by SSH.
For X11 forwarding over SSH to work, both the SSH client and SSH server must be properly configured.
X11 forwarding must be enabled on The SSH server side. This is the machine where the application resides. To enable the feature, make sure the X11 configuration file /etc/ssh/sshd_config on the server contains this line:
X11Forwarding yes
If you edit the said file, you need to restart the sshd daemon for the change to take effect.
On Debian or Ubuntu systems, you restart the SSH daemon like this:
$ sudo service ssh restart
[ ok ] Restarting OpenBSD Secure Shell server: sshd.
$
On the ssh client side, you need to run SSH command with the proper parameters. For instance, suppose you want to run the xclock application on the remote SSH server and have it displayed back on the local client.
$ ssh -fX peter@192.168.1.112 xclock 
peter@192.168.1.112's password: 
$
The -X parameter allows an one-off X11 forwarding session.
The -f parameter instructs the SSH client to go to the background just before xclock is run.
If you want to permanently enable X11 forwarding for an user, insert this line in the user's own ~/.ssh/config file on the local host.
ForwardX11 yes 
With X11 forwarding permanently enabled for the client, you can leave out the -X parameter:
$ ssh -f peter@192.168.1.112 xclock 
peter@192.168.1.112's password: 
$
If X11 forwarding is not enabled on the SSH server, any attempt to tunnel X11 will fail with the following error message:
$ ssh -X peter@192.168.1.112 xclock 
peter@192.168.1.112's password: 
X11 forwarding request failed on channel 0
Error: Can't open display: 
$
If X11 forwarding is properly enabled on the server side, you will see a nice looking clock displayed on your local screen.

Sunday, October 5, 2014

5 Open Source Cloning Software

Copied from the link:

http://www.cyberciti.biz/datacenter/5-awesome-open-source-cloning-software/

by  on AUGUST 22, 2014 · 0 COMMENTS· LAST UPDATED AUGUST 22, 2014
Cloning is nothing but the copying of the contents of a server hard disk to a storage medium (another disk) or to an image file. Disk cloning is quite useful in modern data centers for:
  1. Full system backup.
  2. System recovery.
  3. Reboot and restore.
  4. Hard drive upgrade.
  5. Converting a physical server to virtual machine and more.
In this post, I'm going to list the Free and Open Source Software for Disk Imaging and Cloning that you can use for GNU/Linux, *BSD and Mac OS X desktop operating systems.

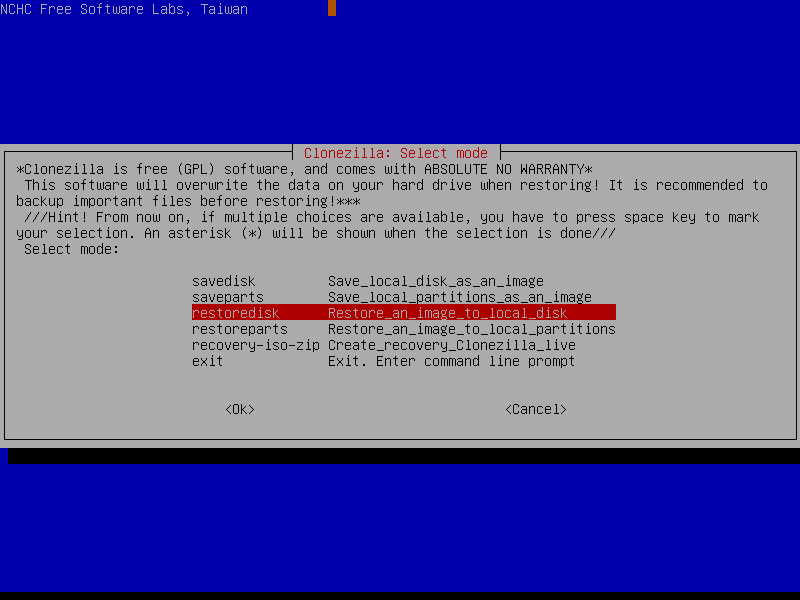
Clonezilla - One Partition and disk cloning program to rule them all

Clonezilla is a partition and disk imaging/cloning program similar to True Image and Norton Ghost. I frequently use Clonezilla software to do system deployment, bare metal backup and recovery. Clonezilla live is good for single machine backup and restore at home. Clonezilla SE is for massive deployment in data center, it can clone many (40 plus!) computers simultaneously. Clonezilla saves and restores only used blocks in the harddisk. This increases the clone efficiency. It supports the following file systems
  1. ext2, ext3, ext4, reiserfs, xfs, jfs of GNU/Linux
  2. FAT, NTFS of MS Windows
  3. HFS+ of Mac OS
  4. UFS of BSD
  5. minix of Minix and VMFS of VMWare ESX.

=> Download Clonezilla

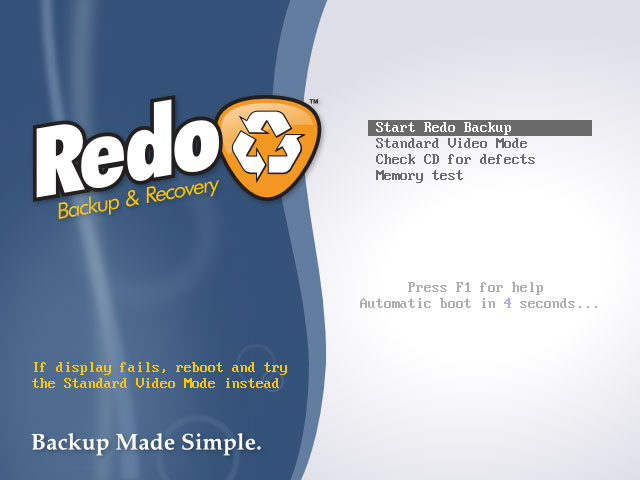
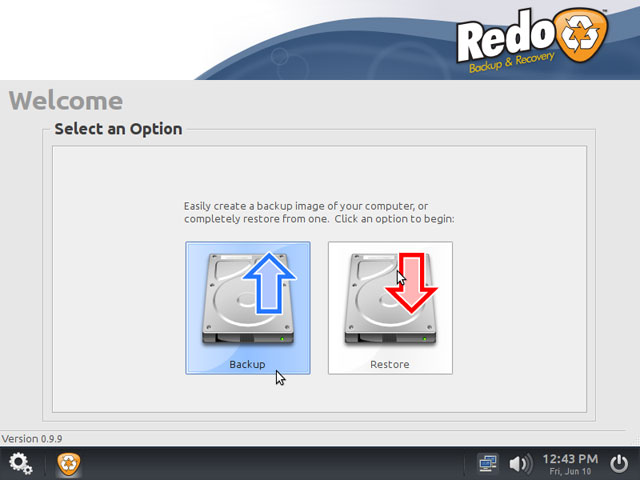
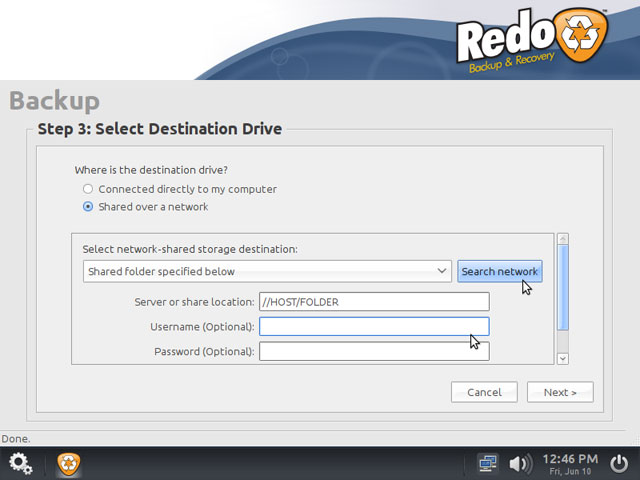
Redo Backup - Easy to use GUI based backup, recovery and restore for new users

Redo Backup and Recovery is a bootable Linux CD image, with a GUI. It is capable of bare-metal backup and recovery of disk partitions. It can use external hard drives and network shares (NFS/CIFS) for storing images. Major feature includes:
  1. It can save and restore MS-Windows and Linux based servers/desktop systems.
  2. No installation needed; runs from a CD-ROM or a USB stick.
  3. Automatically finds local network shares.
  4. Access your files even if you can't log in.
  5. >Recover deleted pictures, documents, and other files.
  6. Internet access with a full-featured browser to download drivers.

=> Download Redo backup

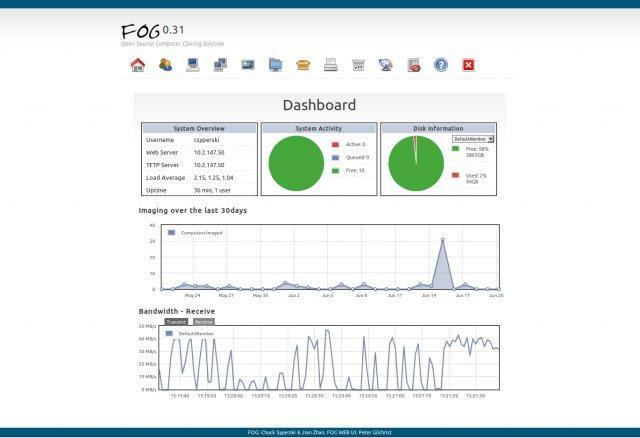
Fog - Perfect cloning solution for Microsoft shop

FOG is a Linux-based, free and open source computer imaging solution for Windows XP, Windows Vista, Windows 7, Windows 8, and Linux (limited) that ties together a few open-source tools with a php-based web interface. FOG doesn't use any boot disks, or CDs; everything is done via TFTP and PXE. Your PC boots via PXE and automatically downloads a small Linux client. From there you can select many activities on the PC, including imaging the hard drive. FOG supports multi-casting, meaning that you can image many PCs from the same stream. So it should be as fast whether you are imaging 1 PC or 40 PCs.

=> Download Fog

Mondo Rescue - Disaster recovery solution for enterprise users

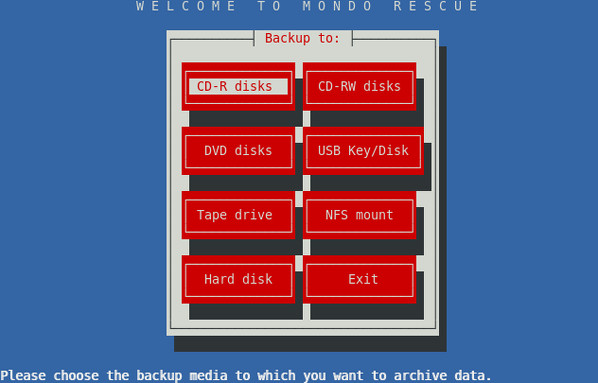
Mondo is reliable disater recovery software. It backs up your GNU/Linux server/desktop to tape, CD-R, CD-RW, DVD-R[W], DVD+R[W], NFS or hard disk partition. Mondo is in use by Lockheed-Martin, Nortel Networks, Siemens, HP, IBM, NASA's JPL, the US Dept of Agriculture, dozens of smaller companies, and tens of thousands of users world-wild. It supports LVM 1/2, RAID, ext2, ext3, ext4, JFS, XFS, ReiserFS, VFAT, and can support additional filesystems easily. It supports software raid as well as most hardware raid controllers.
Mondo Rescue In Action

=> Download Mondo Rescue

dd and friends - The ol' good *nix utilities

Warning: dd/ddrescue/dcfldd are power tools. You need to understand what it does, and you need to understand some things about the machines it does those things to, in order to use it safely.
The dd command converts and copies a file. You can clone a hard disk "sda" to "sdb":
 
dd if=/dev/sda of=/dev/sdb bs=1M conv=noerror
 
To clone one partition to another:
 
dd if=/dev/sdc3 of=/dev/sdd3 bs=4096 conv=noerror
 

dcfldd: A fork of dd

dcfldd is an enhanced version of GNU dd with features useful for forensics and security. Here is an example of cloning a hard disk "sda" and store to an image called "/nfs/sda-image-server2.dd":
 
dcfldd if=/dev/sda hash=md5,sha256 hashwindow=10G md5log=md5.txt sha256log=sha256.txt \
       hashconv=after bs=512 conv=noerror,sync split=10G splitformat=aa of=/nfs/sda-image-server2.dd
 
GNU ddrescue is a data recovery tool. It copies data from one file or block device (hard disc, cdrom, etc) to another, trying to rescue the good parts first in case of read errors.