Search This Blog

Sunday, October 5, 2014

5 Open Source Cloning Software

Copied from the link:

http://www.cyberciti.biz/datacenter/5-awesome-open-source-cloning-software/

by  on AUGUST 22, 2014 · 0 COMMENTS· LAST UPDATED AUGUST 22, 2014
Cloning is nothing but the copying of the contents of a server hard disk to a storage medium (another disk) or to an image file. Disk cloning is quite useful in modern data centers for:
  1. Full system backup.
  2. System recovery.
  3. Reboot and restore.
  4. Hard drive upgrade.
  5. Converting a physical server to virtual machine and more.
In this post, I'm going to list the Free and Open Source Software for Disk Imaging and Cloning that you can use for GNU/Linux, *BSD and Mac OS X desktop operating systems.

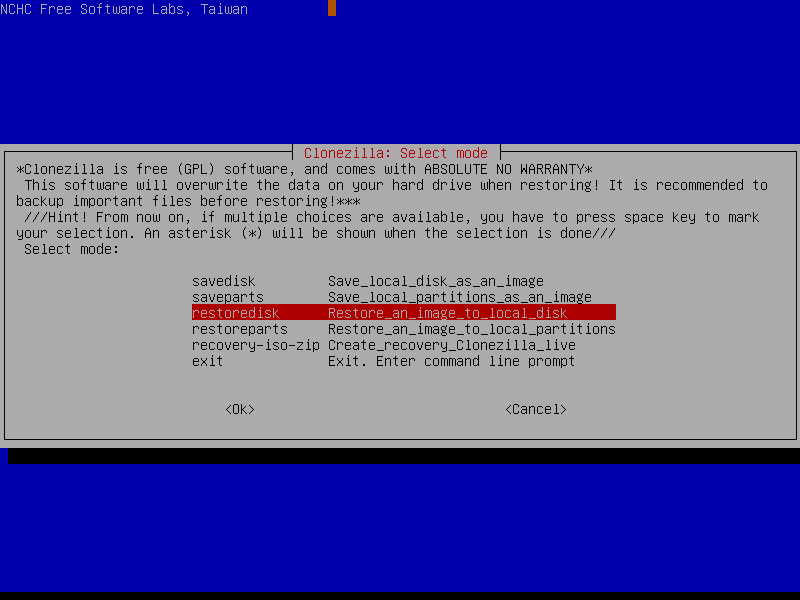
Clonezilla - One Partition and disk cloning program to rule them all

Clonezilla is a partition and disk imaging/cloning program similar to True Image and Norton Ghost. I frequently use Clonezilla software to do system deployment, bare metal backup and recovery. Clonezilla live is good for single machine backup and restore at home. Clonezilla SE is for massive deployment in data center, it can clone many (40 plus!) computers simultaneously. Clonezilla saves and restores only used blocks in the harddisk. This increases the clone efficiency. It supports the following file systems
  1. ext2, ext3, ext4, reiserfs, xfs, jfs of GNU/Linux
  2. FAT, NTFS of MS Windows
  3. HFS+ of Mac OS
  4. UFS of BSD
  5. minix of Minix and VMFS of VMWare ESX.

=> Download Clonezilla

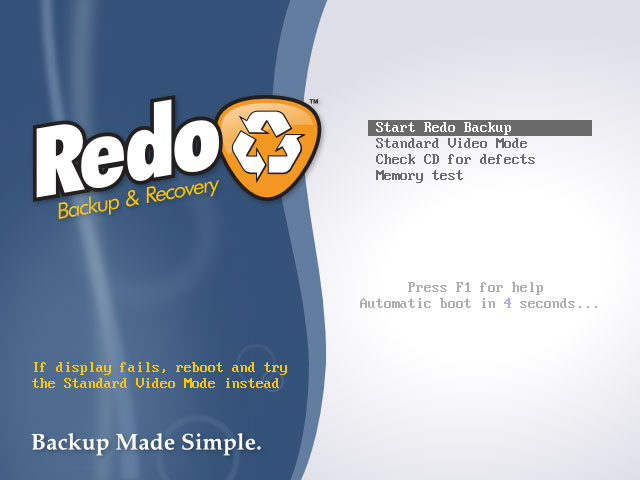
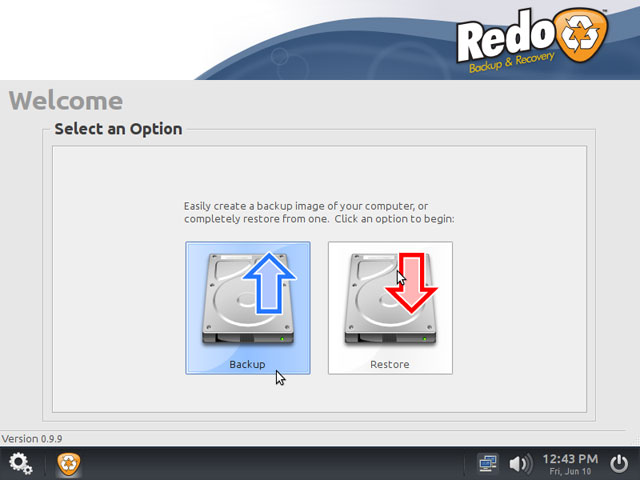
Redo Backup - Easy to use GUI based backup, recovery and restore for new users

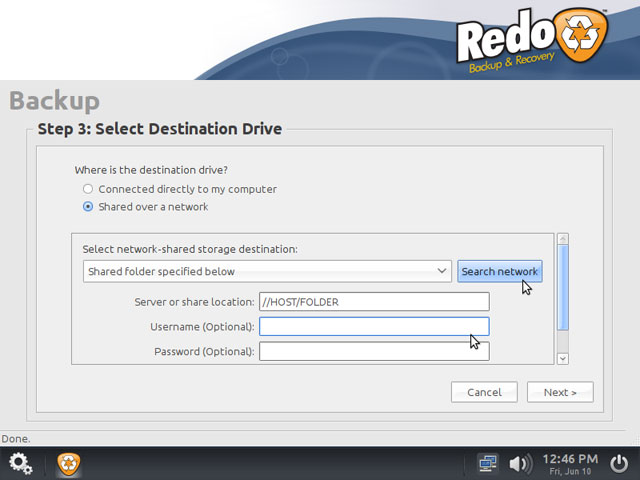
Redo Backup and Recovery is a bootable Linux CD image, with a GUI. It is capable of bare-metal backup and recovery of disk partitions. It can use external hard drives and network shares (NFS/CIFS) for storing images. Major feature includes:
  1. It can save and restore MS-Windows and Linux based servers/desktop systems.
  2. No installation needed; runs from a CD-ROM or a USB stick.
  3. Automatically finds local network shares.
  4. Access your files even if you can't log in.
  5. >Recover deleted pictures, documents, and other files.
  6. Internet access with a full-featured browser to download drivers.

=> Download Redo backup

Fog - Perfect cloning solution for Microsoft shop

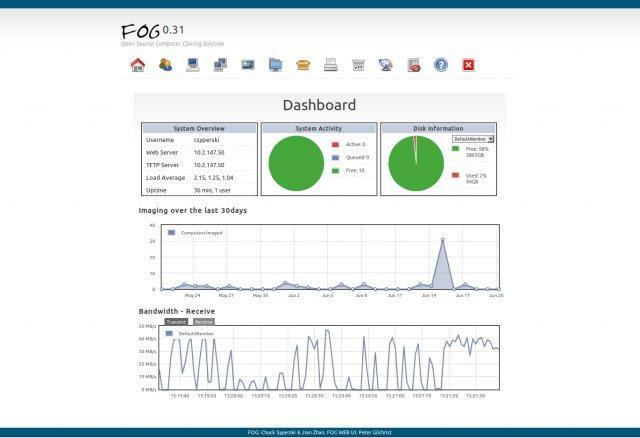
FOG is a Linux-based, free and open source computer imaging solution for Windows XP, Windows Vista, Windows 7, Windows 8, and Linux (limited) that ties together a few open-source tools with a php-based web interface. FOG doesn't use any boot disks, or CDs; everything is done via TFTP and PXE. Your PC boots via PXE and automatically downloads a small Linux client. From there you can select many activities on the PC, including imaging the hard drive. FOG supports multi-casting, meaning that you can image many PCs from the same stream. So it should be as fast whether you are imaging 1 PC or 40 PCs.

=> Download Fog

Mondo Rescue - Disaster recovery solution for enterprise users

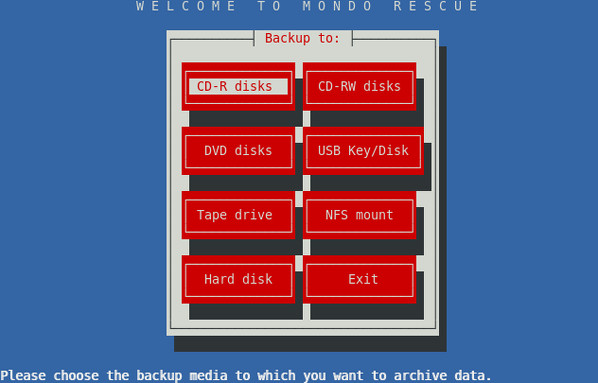
Mondo is reliable disater recovery software. It backs up your GNU/Linux server/desktop to tape, CD-R, CD-RW, DVD-R[W], DVD+R[W], NFS or hard disk partition. Mondo is in use by Lockheed-Martin, Nortel Networks, Siemens, HP, IBM, NASA's JPL, the US Dept of Agriculture, dozens of smaller companies, and tens of thousands of users world-wild. It supports LVM 1/2, RAID, ext2, ext3, ext4, JFS, XFS, ReiserFS, VFAT, and can support additional filesystems easily. It supports software raid as well as most hardware raid controllers.
Mondo Rescue In Action

=> Download Mondo Rescue

dd and friends - The ol' good *nix utilities

Warning: dd/ddrescue/dcfldd are power tools. You need to understand what it does, and you need to understand some things about the machines it does those things to, in order to use it safely.
The dd command converts and copies a file. You can clone a hard disk "sda" to "sdb":
 
dd if=/dev/sda of=/dev/sdb bs=1M conv=noerror
 
To clone one partition to another:
 
dd if=/dev/sdc3 of=/dev/sdd3 bs=4096 conv=noerror
 

dcfldd: A fork of dd

dcfldd is an enhanced version of GNU dd with features useful for forensics and security. Here is an example of cloning a hard disk "sda" and store to an image called "/nfs/sda-image-server2.dd":
 
dcfldd if=/dev/sda hash=md5,sha256 hashwindow=10G md5log=md5.txt sha256log=sha256.txt \
       hashconv=after bs=512 conv=noerror,sync split=10G splitformat=aa of=/nfs/sda-image-server2.dd
 
GNU ddrescue is a data recovery tool. It copies data from one file or block device (hard disc, cdrom, etc) to another, trying to rescue the good parts first in case of read errors.

Tuesday, July 9, 2013

Online Compilation of Programs in Any Programming Language

Compile Online:  You can compile and execute program of any programming language online on the site given below:


http://www.compileonline.com/


Monday, March 18, 2013

How to cancel printing or to delete a print job that is stuck in the print queue in Windows XP


Introduction

Printing problems are some of the most frustrating problems that we experience as computer users. This article discusses what to try if you have a problem when you try to cancel a print job, or if you have a problem when you try to delete a print job from the print queue. The four step-by-step methods in this article are intended for beginning to intermediate computer users.

If you have to cancel a print job, try Methods A through D in order.

If you have to delete a print job from the queue, go straight to Method D.

Resolution

Method A: Press the cancel button or use the cancel menu command on the printer

The most obvious way to cancel a print job is to find a cancel button or a cancel menu command on the printer and to press it. So, if you have not already done this, try this method first.

If this method worked for you, you are finished with this article. However, you may want to read the "Prevention tips" section to avoid this problem in the future.

If your printer does not have these items or if this method did not work for you, try Method B.

Method B: Turn the printer off and on

Next, try turning the printer off and then on. With certain printer models, this cancels the print job.

If this method worked for you, you are finished with this article. However, you may want to read the "Prevention tips" section to avoid this problem in the future.

If this method did not work for you, turn your printer off, and then try Method C.

Method C: Use Control Panel to cancel printing

This method is a bit fancier. We will use Control Panel to try to cancel printing.

But what exactly are you trying to do? Are you trying to cancel printing only a single document, or are there other print jobs that you want to cancel? And are all the print job yours, or are there print jobs that other people have sent to the printer? If you have to cancel documents that other people have sent to the printer, you must have Computer Administrator status or you must have permission to cancel the print jobs. If you are using your own printer, you most likely have Computer Administrator status. If you are printing to a shared printer, you might have to ask the system administrator to cancel the print job for you.

To cancel one or more print jobs, follow these steps.
  1. Click Start, and then click Run.
  2. In the Open box, type control printers, and then click OK.
  3. Right-click the icon for your printer, and then click Open.
    • To cancel individual print jobs, right-click the print job that you want to cancel, and then click Cancel.
    • To cancel all print jobs, click Cancel All Documents on the Printer menu.
Note If you cancel a print job that you did want to print, make sure that you send the print job to the printer again.

If this method worked for you, you are finished with this article. However, you may want to read the "Prevention tips" section to avoid this problem in the future.

If this method did not work for you, make sure that your printer is turned off, and then try Method D.

Method D: Stop the print spooler and delete all spooled files

If you tried Methods A through C and you were not successful, Method D should work for you. If you came to Method D immediately only to delete a print job, some of what we say here might not apply to you, so please bear with us.

Method D is somewhat more complex and will require a bit more work than the other methods, but don't worry. Method D looks much more difficult than it really is.

First, in case that you don’t know how printing works, here is a short explanation. Print jobs are sent to the printer as spooled files. This means that the files are put in a temporary location so that the printer can access a print queue and print jobs at its own speed. If you stop the spooler and its files, most of the time, you both cancel printing and delete the print job.

Note To use this method, you must have Computer Administrator status. If you are using your own printer, you most likely have Computer Administrator status. If you are printing to a shared printer, you might have to ask the system administrator to cancel the print job for you.

Step 1: Start Notepad

To stop the print spooler and its files, we will have you create and run a script file that will automatically stop the service. This sounds difficult, but it really isn't. Just follow these steps carefully.
  1. Click Start, and then click Run.
  2. In the Open box, type notepad, and then click OK. Notice that a blank Notepad document opens.

Step 2: Copy a command script to Notepad

Now we will have you copy and paste some commands to the Notepad document.
  1. Carefully select (highlight) all the following text:
    net stop spooler
    del %systemroot%\system32\spool\printers\*.shd
    del %systemroot%\system32\spool\printers\*.spl
    net start spooler
  2. Right-click the text that you selected, and then click Copy.
  3. In Notepad, right-click in the blank document, and then click Paste.
  4. Carefully select (highlight) all the following text:
    C:\DeletePrintJobs.cmd
  5. Right-click the text that you selected, and then click Copy.
  6. In Notepad, click Save As on the File menu.
  7. In the File Name box, right-click, and then click Paste.

    Note Notice that this file name differs from most other file names that you might have seen. That is because this file is a command script file.
  8. Click Save.

Step 3: Run the command script file

Now that you have created the command script file, you will run it. To run it, you will copy and paste the name of the command script file in the Run box.
  1. Carefully select (highlight) all the following text:
    C:\DeletePrintJobs.cmd
  2. Right-click the text that you selected, and then click Copy.
  3. Click Start, and then click Run.
  4. In the Open box, right-click, and then click Paste.
  5. Click OK.
  6. Notice that the Command Prompt window opens to run the command script file that you created. Notice also that this window closes automatically when the command script file has finished running. If you do not see the Command Prompt window open, check that you saved the command script file by using the correct name and that you entered the correct command script file name in the Run box.
Note If this method does not work the first time, or if you cannot print anything after you use this method, restart your computer, and then try again.

If this method worked, you are finished with this article. However, you may want to read the "Prevention tips" section to prevent this problem from happening again.

If this method does not work, we're sorry that this article was unable to help you. For your next steps, you might want to ask someone for help or contact support. For information about how to contact support, visit the following Microsoft Web site:

Prevention tips

To prevent this problem in the future, always make sure that you have the most recent printer driver installed on the computer. 

Wednesday, September 5, 2012

Tuesday, January 24, 2012

DansGuardian Documentation Wiki - Customizing the Block Page Template

Customizing the Block Page Template


From the link:  http://contentfilter.futuragts.com/wiki/doku.php?id=template_customization

The HTML Template File is the most common way of delivering a blocked page message to a user. It delivers a blocked page message quickly and cleanly to all web browsers, and does almost nothing else. It's just regular HTML; there's no special syntax. You can edit it with any text editor.
When you install DansGuardian you should at minimum modify the Block Page Template a little bit to include your own contact information. That way your users will know who and how to call if they have a problem. The rest of this document focuses on making more than just the minimum modifications to the Block Page Template.

(If you're very interested in Using Blocked Message Delivery for Other Purposes Too, you may need to deliver the blocked page message not this way via an HTML Template but rather via Method 2 (of 2): Using a CGI Program. That method also requires adding a web server. A CGI program used to be the standard way to deliver a blocked page message, but has been superceded almost completely by the much simpler HTML Block Page Template; that's why many custom CGI programs for DansGuardian can still be found on the web, but they're several years old.)

Enabling the HTML Template

In your dansguardian.conf file set the reportinglevel = 3 as you see below.
# Web Access Denied Reporting (does not affect logging)
#
# -1 = log, but do not block - Stealth mode
#  0 = just say 'Access Denied'
#  1 = report why but not what denied phrase
#  2 = report fully
#  3 = use HTML template file (accessdeniedaddress ignored) - recommended
#
reportinglevel = 3

Modifying the HTML Template

Which Base?

Usually the HTML Template File should at least be personalized a little bit to better fit into your environment. But what should you use as a base when personalizing the HTML Template?
The HTML Template File that is provided when DansGuardian is installed may itself be fully adequate. Often the appropriate thing to do is to simply modify this supplied HTML Template File. Sometimes though rather than modifying the supplied HTML Template File you'll want to replace it with a version you obtained elsewhere that looks completely different. To see some alternative HTML Template Files (and images), browse to http://dansguardian.org/?page=extras and look under the heading “Reporting script and gif replacements:”. (CGI Program variants were much more common before the HTML Template File option was available, so this list has not been updated nor expanded recently.)

Where Is It?

To find the HTML template file, follow the values of the languagedir and language options in your dansguardian.conf. Sometimes languagedir will be a subdirectory of your configuration directory (for example /etc/dansguardian/languages), while other times it will be in a “share” data directory. In every case the file will be named 'template.html'. Paths will of course be different on different systems; one typical path is /usr/local/etc/dansguardian/languages/ukenglish/template.html, another is /etc/dansguardian/languages/ukenglish/template.html, yet another is /usr/share/dansguardian/languages/ukenglish/template.html.

Editing It

Make a backup copy of the original HTML Template File before modifying or replacing it.
As the HTML Template is just regular HTML, edit it the same way you'd edit any other webpage source file. Often you should simply edit the file with any text editor. (HTML editors may or may not work well, as the comments and variable information may confuse them or may become mangled although the intention is to “save” them.)
Directly edit the pre-modified file that exists on the system, rather than any post-modified content that was sent to a web browser. The post-modified content will be specific to a particular blocked page, whereas what you want to edit is the more generic and flexible pre-modified template file.
View intermediate versions of your modified file as often as you like by directly (not through DansGuardian) using any web browser until the general appearance is as you desire. Then, to see the results of substituting the variable bits of information, first guarantee that DansGuardian is aware of your changes by executing dansguardian -g, and go to any end user computer and pretend to be any end user and try to access a website you know will be blocked so the blocked page will be shown through DansGuardian to your web browser.

Tweaking Functionality

The HTML File is just plain old HTML with no particular restrictions; you can put anything in here that web browsers understand. To give you more power, several variables can be filled in by “text substitution” before the file is sent to a browser. You can use these variable parameters to provide lots of functionality and enable different clever display options.
You can tell each user at several levels of detail exactly why the page they tried to access was banned. You can give yourself hints on which list file a restriction is in so you can change it more easily. You can provide click-to-acknowledge "bypass" functionality to some filter groups. And so forth. Since many options straddle the line between “functionality” and “appearance”, they're also described below.

Tweaking Appearance

You may simply wish to personalize the blocked page. For example you should probably replace “YOUR ORG NAME” with the name of your specific organization (“Humpty Dumpty Walls Co.”, or “Saguaro Elementary School”, or …) For another example, you may wish to change the reference to DansGuardian to be just regular text rather than an active hyperlink.
Doing only this sort of change is very simple.
Or, you may wish to go further and make the blocked page more informative to the user by rearranging or customizing the information that's specific for each request. You can tell the user both what was blocked and why it was blocked, and if you wish also give the user a way to acknowledge the block then bypass it. There are quite a few potential bits of information that can be substituted in by DansGuardian before the HTML is sent to the web browser. Only simple text replacement without any knowledge of or attention to syntax is used; the HTML Template File should be correct HTML before the replacements and remain correct HTML after the replacements.
These bits of information can be used to tailor the blocked page to be a little more specific for each presentation to each user. The available bits of information are described by comments in the template file; you can also consult a list of HTML File Parameters.
This sort of change is also straightforward, and is a good idea in many cases.
You may wish to go even further and use CSS to produce a fancier appearance (although the increased complexity may not be worth it). The HTML Template can (but need not) contain CSS, which will simply be passed through to the user's browser. The only pre-processing DansGuardian does to the template before delivering it to the user is simple text string variable substitution.
Finally, the HTML Template can even (but usually doesn't) contain JavaScript, either for further tweaking appearance or for implementing some client-side processing. (You could even do variable substitution within your JavaScript code.)
Be wary of adding JavaScript to the HTML Template though, not only is the increased complexity often not warranted but it might not even work all the time. Browsers often restrict some JavaScript features. By using JavaScript in the HTML Template, you could get into a situation where something as basic as the “blocked page message” sometimes can't be delivered. You should probably add JavaScript to the HTML Template only if you can guarantee that all web browsers will always have all the JavaScript functions you use enabled.
Even these sorts of more extensive changes are available to anyone that wrangles HTML, and they do not require a web server.
Only adding media files (for example images, not just solid rectangles of color) as described below will require adding a web server.

Adding logos or other content to the Template

If you wish to add extra content to the html template you will need to place that content (image, flash file etc.) on a web server. This can be on the same machine as DansGuardian is running, another server on your network or even a server on the internet.
Edit the html template so the img is a full URL. For Example:
img src="http://example.com/path/image.jpg"
The following won't work
img src="path/image.jpg"
If you don't follow the instructions above you will get the following scenario. When you visit a blocked page, the block page doesn't include the image/content and when you look at the properties of the object it shows the object location as:
http://denied url/image.jpg.

Sources of Graphics

You can either create/manipulate an appropriate graphic, or use unchanged an existing one.
Graphics can be in any of the formats understood by web browsers, or to say the same thing with different words those formats that are commonly used on the web. The common web still graphic formats are .GIF, .JPG, and .PNG. (DansGuardian supports any web still graphic format, which in some cases also includes other formats such as .SVG.) You can create images with almost any image editor, including high end commercial tools like Photoshop, high end Open Source Software tools like TheGIMP, and shareware or freeware tools like IrfanView. You may only need very few functions, such as “crop” “scale” and “edit palette”. If you have a suitable graphic but it's in TIFF format so you just need to convert it, just a very simple shareware or freeware tool may be all you need.
You might be able to obtain a graphic that's already suitable for use. Perhaps a school or company admin can supply one. Or perhaps you'll find something suitable in a clipart library. Or perhaps you can use some other DansGuardian user's contribution. On the webpage http://dansguardian.org/?page=extras look under the “Reporting script and gif replacements” heading.